Author

Donna En

Browsing

Your kitchen is more than just a block to prepare meals; it’s the heart of your home. If you’re passionate about cooking or simply enjoy spending time in the kitchen, a professional kitchen remodel can elevate your culinary experience to new heights. This comprehensive guide will explore the key considerations and essential elements for transforming your kitchen into a professional culinary haven.

Kitchen Remodeling For a Perfect Kitchen Experience!

Here is how you can transform your kitchen with professional kitchen remodeling in San Antonio and bring the MasterChef in you out!

1. Planning & Design

Before diving into a kitchen remodel, careful planning and design are paramount. Start by assessing your needs, considering your cooking style, and envisioning the desired functionality of your kitchen. Collaborate with professional designers or use online tools to create a detailed layout that optimizes workflow, incorporates ample storage, and maximizes space utilization.

2. Ample Storage Solutions

An organized kitchen is essential for efficiency and productivity. Incorporate ample storage solutions into your remodeling plans, such as deep drawers, pull-out cabinets, and built-in pantry systems. Utilize vertical space by adding overhead cabinets or installing open shelves to retrieve commonly used items conveniently. Customizable inserts and dividers can help keep your kitchen tools and utensils neatly arranged.

3. Functional Countertops & Workstations

Countertops are the workhorses of any kitchen. Get durable and low-maintenance materials like quartz, granite, or stainless steel that can withstand heavy use and resist stains and heat. Designate separate workstations for different tasks, such as food preparation, cooking, and cleanup. A certified kitchen remodeling agency can help you include a central island or a butcher block for additional workspace and storage.

4. Adequate Lighting

Proper lighting is crucial for a functional kitchen. Design a well-lit environment by combining ambient, task, and accent lighting. Install overhead fixtures with adjustable brightness, under-cabinet lighting for focused illumination, and pendant lights for visual appeal. Natural light is also beneficial, so maximize window placements or consider skylights if feasible.

5. Thoughtful Flooring

Select flooring materials that are durable and simple to maintain. Options like ceramic tiles, hardwood, or vinyl are popular for professional kitchens. Consider slip-resistant surfaces to enhance safety, especially in high-traffic areas. The flooring should complement the overall aesthetic of your kitchen while providing functionality and practicality.

6. Stylish & Functional Backsplash

A well-designed backsplash not only adds visual appeal but also protects your walls from spills and stains. Consider materials, like glass, subway tiles, or stainless steel, for easy cleaning. Opt for a style that complements your kitchen design, whether it’s sleek and modern or warm and rustic. Add a personal touch by incorporating mosaic patterns or unique tile arrangements.

Transform Professional Kitchen With Experts!

A professional firm for kitchen remodeling in San Antonio can transform your culinary adventure, enhancing both functionality and aesthetics. By carefully planning the design, investing in high-quality appliances, optimizing storage solutions, and incorporating essential elements like lighting, flooring, and backsplashes, you can create a kitchen that reflects your passion for cooking while elevating your home to a new level of sophistication and efficiency.

Plumbing Kitchener services are important to have in your home. They can help you prevent many common problems with your plumbing system and make sure that the water in your home is safe to use. When you have a problem with your plumbing, it is important that you get it fixed as soon as possible. This is because a small leak or clog can quickly turn into a larger problem if it is not addressed early on.

There are many different types of plumbing Kitchener services available today, so homeowners have a wide variety of choices when it comes to their plumbing needs. If you need someone to come out and fix a leaky faucet or unclog your toilet, there are companies that can do this for you at reasonable prices. If you need professional advice about installing new fixtures or upgrading certain parts of your home’s pipes, there are plumbers who specialize in this type of work as well.

You should always hire a licensed professional when hiring someone to do any kind of work on your home’s pipes or drains. This ensures that they have the proper training and experience needed to properly complete the job safely without causing damage to themselves or anyone else living in the house.

Save Money

When you hire a professional plumber, you save money on materials as well as time. Plumbers have the appropriate tools and experience needed to complete a job quickly and efficiently. They also have access to special discounts on supplies through their suppliers that homeowners do not necessarily have access to.

Peace of Mind

When you have an emergency plumbing situation at home, it can be very stressful trying to figure out who to call and how much it will cost you in the end if there is extensive damage. Hiring an experienced plumbing Kitchener service will give you peace of mind knowing that someone is taking care of the problem right away without all the stress on your part! They’ll also be able to give you tips on how to prevent future issues from occurring as well as save money by installing quality products at a reasonable price point!

Save Time

When an issue comes up with your plumbing system, it can be extremely disruptive to your daily routine and schedule. You may have trouble doing simple tasks like taking a shower or using the bathroom because of the inconvenience caused by the problem with your plumbing system. Hiring a professional plumber allows you to get back on track without having to wait for repairs or replacements to be made by someone who doesn’t know what they’re doing!

No Leakage Of Water

You can prevent any kind of leakage of water by hiring professionals for this service. They will make sure that all your pipes are working properly and that there is no leakage of water at any time. So, if you want to avoid any kind of leakage in your pipes or even if you want to avoid wasting money on repairs and replacements, then hiring professionals for this task is a good idea.

Expertise

When you hire a professional plumber, you can be sure that they have all the expertise required to handle any issue that may arise within your plumbing system. This means that even if you have never had a problem before, they will still be able to find out what is causing it and how best to fix it. This ensures that their work is always done correctly and efficiently so that you don’t have to worry about any further problems arising in the future after they leave!

Save Money On Water Bills

If your home has an older plumbing system, it may not be able to provide enough hot water for all of the showers, sinks and washing machines at the same time. This means that you will have to wait for your washing machine to finish its cycle before you can take a shower or run the dishwasher. When you hire a plumbing Kitchener service provider to upgrade your old pipes with new ones, you will be able to use all of these appliances at once without having to wait for one to finish its cycle first.

Pipes and Fixtures Will Last Longer

Plumbing is an important part of your house, and it will require maintenance on a regular basis. For example, if you want to keep your pipes from getting corroded or damaged, then you must make sure that they get cleaned regularly. If you don’t offer this service on a regular basis, then your pipes will start leaking water or even burst due to corrosion and age. If you have an older home with very old pipes, then it might be best to replace them with new ones so that they last longer.

Conclusion:

Plumbing Kitchener services are crucial for anyone who is not content with their current system. When you need a professional to handle your issues, there is no better option than these services—they will get the job done and get it done well. And that means that you will have a more comfortable experience in your home.

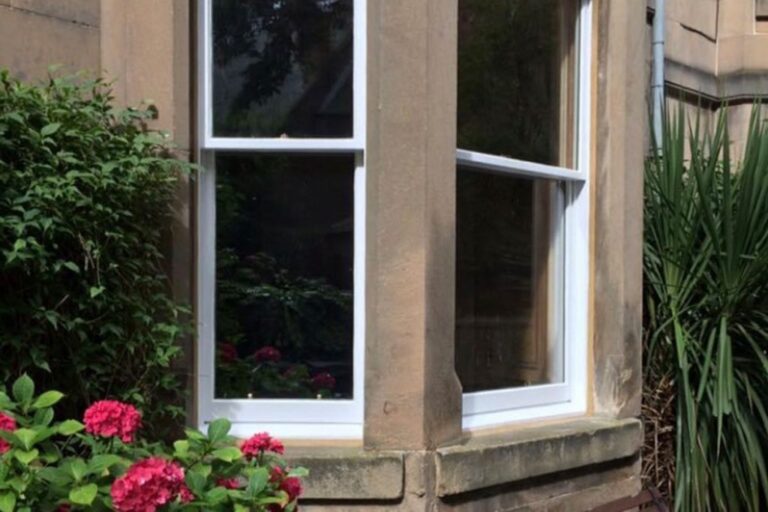
Sash and case windows are two popular window styles, but what makes them different? While both offer unique advantages, sash windows may be the better choice for those looking to achieve a certain look or save money on their budget. Learn more about the differences between these two types of windows and how they can transform your home today! Sash windows are usually made with two frames that hold several panes of glass.

The frame is connected by a system of weights and pulleys, allowing the window to open and close easily. Casement windows are generally hinged on one side, allowing them to be opened outward like a door. Both types come in either single- or double-glazed panels, helping keep your home cool during the summer months and warm during the winter.

Sash windows have several benefits that casement windows don’t offer. For example, they can help you achieve a more traditional look than their modern counterparts. Additionally, they are easier to repair or replace since they are held together by simple hardware instead of needing complex structural components.

They can also provide a secure and reliable way to keep your home safe. They come with a locking mechanism that allows you to easily lock them in place, making it hard for someone to break into your home. And because they are made of wood, they can be painted or stained to match the design and appearance of your home.

Overall, sash windows offer several advantages over their casement window counterparts. Not only do they give your home a unique and beautiful look, but they are also extremely easy to maintain and install. Additionally, they are usually more affordable than other types of windows, making them ideal They also work well in different settings, such as contemporary or classic homes, and can be easily customized to fit any size window frame.

If you have a child who loves dinosaurs, then you know how much they can love to learn and study all things related to the prehistoric giants. If you want to make your little one’s bedroom extra special, why not consider adding dinosaur wallpaper? We have an amazing selection of self-adhesive and paste-the-wall wallpapers that are perfect for any dinosaur enthusiast! 

Types of Dinosaur Wallpaper Available

Our selection includes a wide range of styles, from realistic dinosaur illustrations to cartoonish designs. For example, if you are looking for something unique but traditional, our T Rex Self Adhesive wallpaper is sure to be a hit with your little one. It features realistic illustrations of different types of dinosaurs and is available in both green and brown. Or if you’re looking for something on the brighter side, our Cartoon Dinosaurs Pastel Self Adhesive wallpapers are perfect. It has a fun pastel color palette with adorable cartoon illustrations that will bring any room alive! 

Other Options Available

We also have several other options available for those who want something even more special. For instance, we offer custom wallpaper printing services that allow you to create the perfect design for your child’s room. Our custom wallpapers come in various sizes, so no matter what size room you’re decorating, there’s an option that will work perfectly! We also have pre-made wallpaper murals that feature larger images such as landscapes or dinosaurs – they are perfect for making any room feel more spacious and vibrant! 

Conclusion:  Decorating your child’s bedroom is a great way to show them how much you care and make their space their own. With our selection of dinosaur wallpapers, you can easily add some fun and excitement into their bedroom without breaking the bank. From self-adhesive options to custom printing services, there is an option that will fit any budget or style preference. So take some time today to browse our selection – it could be just what you need to make your little one’s bedroom extra special!


An accessory dwelling unit (ADU) is a small, self-contained living space that is attached to or detached from a single-family home. When designed and built well, ADUs can provide homeowners with extra income, additional living space for family members or guests, and enhanced property values.

If you’re thinking about adding an ADU to your California property, here are six design ideas to keep in mind that will help increase your property value!

1. Incorporate Sustainable Design Features

When it comes to sustainable design features, there are many things you can do to make your ADU in Campbell, CA, more eco-friendly and energy efficient. Some sustainable design features you may want to consider incorporating into your ADU design include solar panels, passive heating and cooling elements, drought-tolerant landscaping, and rainwater harvesting systems. Not only will these sustainable design features help reduce your environmental impact, but they’ll also help lower your utility bills and make your ADU more attractive to renters or buyers looking for a green home.

2. Create a Functional Layout

Your accessory dwelling unit should have a layout that is practical and well-planned in order to make the most of the space that is available. You will want to give some thought to including a living space as well as a workspace in addition to the standard conveniences such as a kitchen, bathroom, and bedroom. Porches, decks, and patios are all becoming increasingly popular additions to accessory dwelling units (ADUs), so if you have the space, you should think about putting in one of these features.

3. Use High-Quality Materials

When you are choosing materials for your ADU, it is imperative that you select high-quality products that can withstand the test of time. This is most important for things like doors and windows, which must be able to withstand the various weather conditions that may be encountered. Not only will the use of high-quality materials make your ADU more weather-resistant and long-lasting, but it will also make it more appealing to people who might be interested in renting or purchasing it.

4. Pay Attention to Details

The details are what really make an ADU special. From the hardware on the cabinets to the light fixtures on the ceiling, paying attention to the details can really make your ADU stand out from the rest. Things like lighting and fixtures may seem like small concerns, but they can actually make a big difference in the overall feel of the space. By taking the time to select quality materials and paying attention to the finer details, you can ensure that your ADU will be both practical and stylish – two things that are sure to increase its value.

If you’re not sure where to start, take a look at some home décor magazines or websites for inspiration. Or better yet, hire an interior designer who can help bring your vision to life.

5. Incorporate Smart Home Technology

One trend that is quickly gaining popularity in homes of all sizes is smart home technology. Luckily, there are many different types of smart home devices that are perfect for use in an ADU. Some of the most popular smart home technologies being used in today’s homes include voice-activated assistants like Amazon Alexa or Google Home, WiFi-enabled thermostats and light bulbs, and security cameras with remote viewing capabilities. Adding just a few simple smart home devices can really make your ADU more appealing to potential renters or buyers who are looking for a technologically advanced home.

6. Make It Accessible

If you’re planning on renting out your ADU or welcoming an elderly loved one to live there, it’s important to make sure it meets all local building code requirements for accessibility. This includes things like wheelchair-accessible doorways and hallways, Grab bars in bathrooms, and lever-style handles on doors and cabinets. Making your ADU accessible will not only help you keep your loved ones safe but also avoid any legal issues down the road. It will also make it more attractive to potential renters or buyers with accessibility needs.

Acton ADU Can Make Your ADU Dreams a Reality

Adding an accessory dwelling unit (ADU) to your property is a great way to increase its value while providing extra income, additional living space, or enhanced property values. However, there are certain things you’ll want to keep in mind when designing and building your ADU. By incorporating sustainable design features, creating a functional layout, using high-quality materials, paying attention to detail, incorporating smart home technology, and making it accessible, you can create an ADU that is both valuable and appealing. At Acton ADU, our experienced team of ADU builders in California can bring your vision to life!

Acton ADU is a leading builder of ADUs in California. We specialize in building unique, stylish, and durable ADUs that are designed to last. Our experienced team works closely with our clients to ensure that their vision for their ADU is realized. We use the latest construction techniques and materials to build our ADUs, and our team is always up-to-date on the latest code requirements. We also offer a wide range of customization options to make sure that your ADU is truly one-of-a-kind. Whether you’re looking for a modern loft or a cozy bungalow, Acton ADU can build you an ADU that meets your needs and exceeds your expectations. Click here to learn more about how we can help you add an ADU to increase your property value.

California ADU Financing Options

If you’re looking for a financing option to build an ADU on your property, Acton ADU also has you covered. Our trusted partner can help you get the financing you need to get started. Interest-only payments are available during the construction period, and you can choose from a variety of options depending on your needs. We offer low fixed rates or adjustable rates, and our closing costs can be included in the loan amount. Plus, your property value will be based on “after improved” valuations, not the current market value. This makes it easy to know exactly what your home is worth and plan accordingly. Contact us today to learn more about our financing options and get started on your dream backyard home!

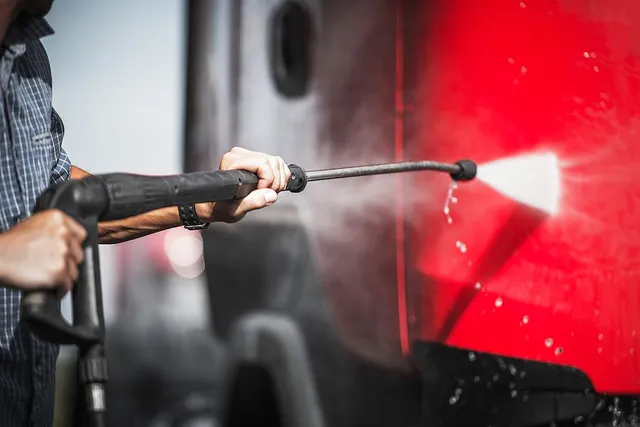
One of the best ways to keep your home looking its best is to power wash it. Power washing is highly effective for removing debris, grime, and stains from your home. Due to exposure to the elements and use over time, different parts of the building can get dirty and gather grime. Given this, here are 5 important parts of your home that need to be power washed:

1. Home Exterior

Over time, the exterior of a building becomes dull and covered with dirt, debris, and pollen. Also, allergens get blown into the house, the bulk of which stay on the exterior walls of the building. Mould, moss, and other microorganisms growing on the side of the building need to be removed. Leaving dirt and grime can discolour the exterior of the building, make it lose its shine, and cause significant damage. Eventually, you may have to replace the facade. If your exterior is stucco, brick, or siding, consider power washing it to make it look great again.

2. Driveway and Sidewalks

The driveway and sidewalks are also subject to harsh weather conditions, which make them dull and dirty over time. Power wash all of the concrete surfaces in your driveway and sidewalks. Mould, grime, dirt, and bacteria can get trapped on the porous surface of the concrete and cause cracking.

3. Roof

The roof of your home is another part of your home that needs to be power washed. Power washing your roof will undoubtedly remove dirt and grime that have accumulated on the roof. Leaving the dirt and grime will make the roof the best place for mould, mildew, and moss.

It will help to hire a professional to power wash your roof due to the height, slopes, and slippery surfaces.

4. Fence

The fence should be power washed to remove mould and moss to prevent wood rot. Fixing a damaged fence can be more expensive than power washing the fence. When power washing your home, remember to power wash the fence as well.

5. Deck

The deck and patio in your home can also be power washed to keep them clean, fresh, and free from mould and moss. This will also prevent mildew buildup and remain hygienic for your use.

Takeaway

The above are five important parts of your home that need to be power washed. To get the best results and restore the shine of those elements, hire a power washing company. Get rid of the dirt and grime on these elements and keep your property in the best condition possible.

Disinfection is an important step in preventing the spread of disease, but it can be difficult to get right. There are many common disinfection mistakes that people make, and if you’re not careful, you could easily contaminate your environment and put yourself and others at risk. In this article, we will discuss the most common disinfection mistakes and how to avoid them.

1. Doing It Wrong

One of the most common disinfection mistakes is doing it wrong. Many people think that they can just spray a disinfectant on surfaces and be done, but this is not the case. You need to make sure that you are using the right products for the job and that you are following the instructions carefully. Otherwise, you could end up doing more harm than good. The best way is to hire disinfection services in Atlanta, as they will know how to do it correctly the first time.

2. Wiping It Off Too Soon

Another common mistake is wiping the surfaces off too soon. If you do this, you will not give the disinfectant enough time to work, and it will not be as effective. You need to wait the recommended amount of time before wiping it off; otherwise, you could end up with a surface that is not as clean as you thought it was.

3. Not Using Enough Disinfectant

When you’re cleaning, more is always better, right? Unfortunately, that’s not the case when it comes to disinfecting. Using too much disinfectant can actually be harmful to your health, but using less than the required amount will leave you vulnerable to germs. The key is to find the sweet spot and use just enough to get the job done without putting yourself at risk.

4. Mixing Disinfectants

Mixing different disinfectants is a bad idea for two reasons. First, it can be dangerous to your health, and second, it can actually make the disinfectants less effective. So it’s important that you find a good quality disinfectant and stick to it. It will also help if you read the labels carefully to make sure that you are using the products correctly.

To Sum It Up

By following these simple tips, you can avoid making common disinfection mistakes and keep yourself and your environment safe. Remember, disinfection is an important part of disease prevention, so take the time to do it right. If you’re not sure how to properly disinfect, contact a professional for help and guidance.

If you are asking if you can put concrete over asphalt, the answer is yes. It’s very common. Why is it done? Sometimes for economic reasons. Sometimes because the homeowner did not want or could not afford to excavate and remove the existing asphalt. For whatever reason, always hire a licensed concrete contractor to do it for you. 

Factors to Consider

As we have mentioned already, concrete can be poured over existing asphalt, but there are important considerations when doing so. 

1. Drainage 

In general, there are some issues to consider before placing concrete over asphalt. The number one issue is drainage. If the existing asphalt slopes towards your house or garage then you need to correct that before placing concrete over it. It will be very difficult if not impossible to correct poor drainage after the concrete is in place.

2. The Condition of the Existing Asphalt Surface

Make sure the existing asphalt surface is in good shape. If there are any cracks, holes, or other forms of deteriorated asphalt, repair them before doing concrete restoration wilmington nc. Areas that are not in good condition will not bond well with new concrete and will cause problems down the road. Also, if your existing driveway is over 15 years old then you should consider removing it and installing a new base before putting down new asphalt or concrete.

3. Thickness of the New Concrete

The thickness of the new concrete poured over the asphalt should be at least 2 inches to ensure a strong bond between the two surfaces. For driveways, 4 inches is recommended. If 2 inches is all that is possible, install wire mesh or rebar through the slab for added strength and support.

4. The Height of your Driveway

Pouring concrete on top of asphalt will add about 4 inches to the height of your driveway. This means you might have to adjust the height of your driveway, garage floor or other structures where your driveway meets them.

5. Decide whether to use a Bonding Adhesive or Install an Overlay

You can put concrete over an existing asphalt driveway using either a bonding adhesive to create a tenacious bond between layers; or by installing an overlay which is typically done with a thinner layer of concrete that has fibers added to it for strength. 

If you’re repairing areas where small cracks have formed, use an adhesive-like Quikrete Concrete Bonding Adhesive instead of trying to patch them with concrete mix and water alone. This product is superior at filling in gaps, covering uneven areas, and adhering to existing surfaces like asphalt and concrete.

Conclusion

If your driveway is in desperate need of a makeover and you are thinking of putting a new surface over the top of the old, you will probably want to lay concrete over asphalt. The good news is that this is perfectly possible to do. Concrete and asphalt are both very strong surfaces that can stand up to the elements quite well. In turn, both materials are great for building driveways to last for many years. This is especially true if they are installed by an experienced concrete contractor. 

window blinds albuquerque nm are a vital part of every home, and choosing the right window covering for your living space is important. residential window blinds springfield nj offer many benefits that you may not know about, but they have some drawbacks too. Read on to learn more about roller blinds and how you can choose the best ones for your home.

1) Fabrics

There are many different types of fabrics used for roller blinds, and each type has its own set of benefits and drawbacks. The most popular type of fabric for roller blinds is polyester, as it is durable and easy to clean. However, polyester can also be quite heavy, so it may not be the best choice for large windows. If you are looking for a lightweight fabric, cotton is a good option, but it is not as durable as polyester.

Aside from polyester, there are also a few other synthetic fabrics that are popular for roller blinds. These fabrics are usually more durable than cotton, but they can be more expensive. Natural fabrics like cotton and wool are also available, but they tend to be less durable and more expensive than synthetic fabrics.

Finally, you may come across vinyl roller blinds. These blinds are very durable and easy to clean, but they can be quite heavy.

2) Sizes

Roller blinds come in a variety of sizes, so you can find ones that fit your windows perfectly. The most common sizes for roller blinds are 36 inches, 48 inches, and 54 inches. However, you can also find blinds that are smaller or larger than these sizes.

There are also companies that do custom sizes, so if you can’t find the right size roller blinds, you can always get them made to order.

3) Types of Rollers

There are two main types of rollers for roller blinds: spring-loaded and corded. Spring-loaded rollers are the most popular type, as they are easy to use and don’t require any cords. Corded rollers are less common, but they offer a cleaner look as there are no cords hanging down from the blinds.

The difference between these two types of rollers is how they are operated. Spring-loaded rollers are opened and closed by pulling on a cord, while corded rollers are opened and closed by turning a knob or wheel.

4) Colors

Roller blinds are available in a wide range of colors, so you can find ones that match your home’s décor. The most popular colors for roller blinds are white, black, and cream. However, you can also find blinds in a variety of other colors, such as blue, green, red, and brown.

When choosing colors and patterns for your roller blinds, it is important to consider the type of room that they will be installed in. For example, if you are installing blinds in a bedroom, you may want to choose a dark color like black or navy blue. If you are installing blinds in a living room, you may want to choose a lighter color like beige or white.

5) Installation

Installing roller blinds is a relatively easy task that most people can do on their own. However, if you are not confident in your ability to install the blinds, you can always hire a professional to do it for you.

The first step in installing roller blinds is to measure the window that they will be installed on. Once you have the measurements, you will need to cut the blinds to size. Most companies that sell roller blinds will provide a template that you can use to make sure that the blinds are cut correctly.

After the blinds are cut to size, the next step is to install the brackets. The brackets should be placed at least four inches from the top and bottom of the window, and they should be evenly spaced apart.

Once the brackets are installed, it is time to hang the blinds. The blinds should be hung so that the cord hangs down in the middle of the window. If there is not enough cord to reach the bottom of the window, you can either tie a knot in the cord or add an extension.

After the blinds are hung, you can add any finishing touches, such as decorative borders or valances.

6) Prices

Roller blinds are relatively affordable, especially when compared to other types of window coverings. You can find basic roller blinds for as little as $10 per blind, and more decorative or blackout blinds for around $50 per blind. Of course, prices may be subject to where you live

When shopping for roller blinds, it is important to keep in mind the size of the window that they will be installed on. Larger windows will require more expensive blinds, as they will need to be made from a thicker fabric.

7) Styles

There are several different styles of roller blinds, so you can choose the ones that best suit your needs. The most popular style is the standard roller blind, which has a simple design and is easy to install. If you are looking for something a little more stylish, you can find roller blinds with decorative borders or patterns.

Another popular style is the blackout roller blind, which is made of a thicker fabric that blocks out all light. Blackout roller blinds are great for bedrooms, as they can help you sleep during the day. If you live in a sunny area, you may also want to consider solar roller blinds. These blinds are made of a reflective fabric that helps keep your home cool in the summer.

8) Maintenance

Roller blinds are easy to maintain, and they should last for many years with proper care. The best way to clean roller blinds is to vacuum them with a soft brush attachment. If the blinds are very dirty, you can also wash them with a mild soap and water solution.

It is important to inspect roller blinds regularly for any damage, such as tears or fraying. If you notice any damage, it is best to replace the affected part of the blind rather than try to repair it.

Conclusion

Roller blinds are a popular choice for window coverings, and they offer a number of benefits. They are affordable, easy to install, and easy to maintain. They also come in a wide range of colors and styles, so you can find the perfect blinds for your home.

Prefabricated trusses are one of the most efficient and economical ways to build a roof. They make it possible for builders and designers to complete construction projects much faster than with conventional methods, saving money and time. When you choose prefabricated trusses, you don’t have to deal with the hassle of cutting lumber or waiting for your order from a local building material supplier. Architecture in Hawaii uses excessive amounts of trusses as make a structure more stable. Read on to learn about everything you should know about buying prefabricated floor trusses in Hawaii.

What is a prefabricated truss?

A truss is a kind of structure that supports the roof or floor of a building. Trusses are used to distribute weight evenly over a span, as opposed to other types of construction materials like I-beams, which support vertical loads only. Trusses are usually made from metal or wood and can be prefabricated in factories before being transported to the building site.

What are the benefits of using prefabricated floor trusses?

Prefabricated trusses are fast, easy and cost-effective to install. They take up less space and weigh less than traditional trusses. Prefabricated trusses are also versatile and can be customized to meet your needs. If you’re thinking about installing a new ceiling or wall in your home, consider using prefabricated trusses instead of conventional wood joists or metal studs.

What types of prefabricated floor trusses are available?

Prefabricated floor trusses are available in many types, including open web, close web, double top chord and double bottom chord. Each type has its advantages and disadvantages; it is important to know the type of truss you need before beginning construction.

Open web floor trusses are manufactured with a slight gap between the webs (the parts that connect the individual joists or rafters). This allows air circulation through the ceiling cavity, which is perfect for the weather in Hawaii. Most open web floor trusses use a 3-2-3 configuration—three vertical posts at each end of the floor span with two horizontal beams connecting them vertically at midpoint height on either side. The resulting “V” shape allows for plenty of air movement while still providing strong structural support to hold up your home’s roof structure.

How do prefabricated trusses help in Hawaii?

Prefabricated trusses are a cost-effective solution for many construction projects. They’re easier to transport and install and take up less space than traditional framing methods. Here’s how they can help you in Hawaii:

  • Prefabricated trusses are lighter than traditional wood framing, making them easier to transport by truck or crane. This can be especially helpful if you need to move materials from one part of your property to another or if there isn’t room on your site, like most areas in Hawaii, for delivery trucks to turn around easily.
  • They’re also easier and faster from an installation perspective because they have fewer parts than conventional lumber structures and because their components are prefabricated offsite in a factory environment before being shipped directly to the job site in Hawaii—meaning less time spent on labor costs like cutting wood pieces into the right shape or fitting them together with nails or screws.

Benefits

Prefabricated trusses offer valuable advantages to builders and designers. These benefits make them a great choice for new construction, renovations, or when building something from scratch. When you’re considering purchasing prefabricated floor trusses in Hawaii, there are four main advantages you should consider:

Installation ease

It’s much easier to install these systems than traditional ones because they come pre-assembled in panels and all fit together with standard hardware.

Transportability 

Because they’re made at an offsite facility and shipped to the job site fully assembled in panels, they can be delivered on trucks rather than needing heavy machinery to move them into place at your site.

Cost-effectiveness 

Prefabricated trusses are less expensive than traditional wood framed structures; this is due largely to their lighter weight and lower material costs associated.

Energy efficiency 

Because of their lightweight design and high R-values (a measure of thermal resistance), prefabricated trusses are energy-efficient and cost-effective.