Category

Flooring

Category

Installing ceramic tiles yourself can be a rewarding and cost-effective way to upgrade your home’s floors, walls, or backsplashes. While professional installation ensures precision, a well-planned DIY project can achieve a high-quality finish with the right tools and techniques.

This guide will walk you through essential DIY tips for installing ceramic tiles like a pro, helping you achieve a polished and long-lasting result.

1. Gather the Right Tools and Materials

Before starting your tiling project, ensure you have the following tools and materials:

Essential Tools

✔ Tile cutter or wet saw
✔ Notched trowel for applying adhesive
✔ Tile spacers for even gaps
✔ Grout float for applying grout
✔ Level and measuring tape
✔ Rubber mallet for setting tiles
✔ Mixing bucket and paddle for mortar
✔ Sponge and clean cloth for wiping excess grout

Materials Needed

✔ Ceramic tiles (such as imitation bois Céramique au Sommet for a wood-look finish)
✔ Tile adhesive or thin-set mortar
✔ Grout (sanded or unsanded depending on the joint size)
✔ Tile sealer (if required)

2. Prepare the Surface Properly

A smooth and clean surface is key to a successful tile installation.

  • For floors: Ensure the subfloor is level and free of dust or debris. Use a self-leveling compound if necessary.
  • For walls and backsplashes: Remove old tiles, repair any cracks, and prime the surface for better adhesion.
  • For wet areas (bathrooms and kitchens): Use a waterproof backer board to prevent moisture damage.

3. Plan Your Layout Before Installing Tiles

A well-thought-out tile layout prevents awkward cuts and uneven designs.

  • Measure the area and mark a central starting point using chalk lines.
  • Dry-lay your tiles to visualize placement and make adjustments before using adhesive.
  • Use tile spacers to maintain even grout lines and ensure a professional look.
  • Consider tile orientation: Tiles that mimic wood (like imitation bois Céramique au Sommet) look best when arranged in a staggered or herringbone pattern for a natural effect.

4. Apply Tile Adhesive Evenly

Using the right adhesive technique is crucial for tile durability.

Use a notched trowel to spread adhesive evenly across the surface.
Apply in small sections to prevent the adhesive from drying before tiles are placed.
Back-butter large tiles (spread a thin layer of adhesive on the back of the tile) for better adhesion.
Press tiles firmly into place and gently tap them with a rubber mallet to ensure a strong bond.

5. Cut Tiles with Precision

Not all tiles will fit perfectly, especially around corners and edges.

  • Use a tile cutter for straight cuts (ideal for backsplashes and floors).
  • Use a wet saw for intricate cuts (especially around pipes or irregular corners).
  • Smooth edges with a sanding stone to remove sharp edges after cutting.

6. Allow Tiles to Set Before Grouting

Once the tiles are in place, let them set for 24 hours before applying grout.

  • Check for level tiles before the adhesive hardens.
  • Remove tile spacers carefully before grouting.
  • Wipe away excess adhesive from tile surfaces before it dries.

7. Apply Grout Correctly for a Clean Finish

Grout fills the spaces between tiles and strengthens the installation.

Choose the right grout: Sanded grout for wide joints, unsanded grout for narrow joints.
Use a grout float to press grout into the joints at a 45-degree angle.
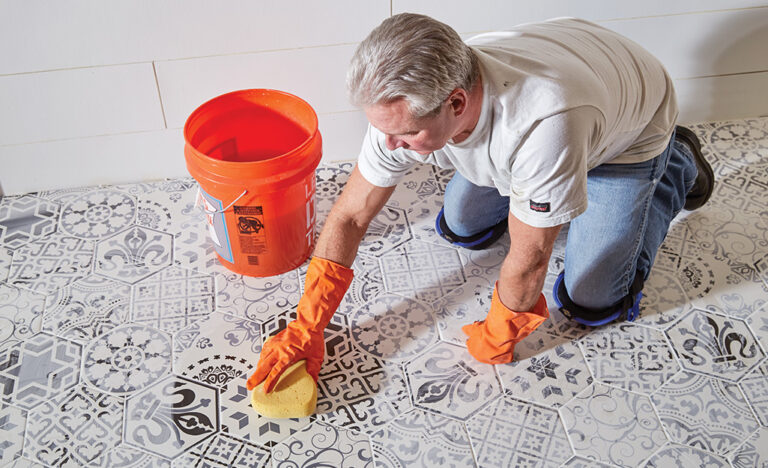
Wipe excess grout with a damp sponge before it dries completely.
Let grout dry for at least 24 hours before sealing (if necessary).

8. Seal Tiles and Grout for Longevity

Sealing is important, especially in moisture-prone areas like kitchens and bathrooms.

Apply a grout sealer to prevent staining and mold buildup.
For porous tiles, use a tile sealer to protect against moisture and dirt.
Reapply sealant every 6-12 months to maintain durability.

9. Avoid Common Tile Installation Mistakes

🔴 Not preparing the surface properly – Uneven surfaces lead to cracked tiles.
🔴 Skipping layout planning – Poor alignment results in uneven cuts and gaps.
🔴 Using too much or too little adhesive – Too much causes uneven tiles, too little leads to loose tiles.
🔴 Not cleaning grout properly – Leaving grout haze on tiles makes them look messy.
🔴 Rushing the drying process – Allow adhesives and grout to fully cure before heavy use.

10. Enjoy Your DIY Tile Installation!

With patience and the right techniques, you can achieve a professional-looking tile installation without hiring an expert. Whether you’re tiling a kitchen backsplash, a bathroom floor, or an entire living space, imitation bois Céramique au Sommet and other high-quality tiles can help bring your vision to life.

By following these DIY tile installation tips, you’ll create a durable, stylish, and functional tiled space that adds long-lasting value to your home.

When designing a new home, many homeowners focus on the big-ticket items like paint, furniture, and decor, but overlook one of the most important details: the rug. A modern rug can tie together a room’s aesthetic and provide comfort underfoot, making it the perfect complement to a newly constructed home.

The Benefits of Modern Rugs

Here are a few benefits of incorporating a modern rug into your newly constructed home:

Adds Color and Texture

Modern rugs can add color and texture to an otherwise neutral space, creating a focal point for the room. This is especially important in newly constructed homes where the walls and floors may be lacking in character.

Provides Comfort

Rugs provide a soft and comfortable surface underfoot, making them a must-have for living rooms and bedrooms. Modern rugs are typically made from materials like wool or synthetic fibers that are soft and plush.

Defines Space

Rugs can define a space and create boundaries between different areas of a room. This is especially helpful in open-concept living spaces, where it can be challenging to create distinct zones.

Absorbs Sound

Modern rugs can absorb sound, making them an excellent choice for homes with hardwood or tile floors. This is especially important in homes with high ceilings or large windows, which can create echoes.

Choosing the Right Modern Rug

When selecting a modern rug for your newly constructed home, there are a few things to consider. Here are some tips to help you choose the perfect rug for your space:

Size

The size of your rug will depend on the size of your room and the furniture arrangement. In living rooms, a rug should be large enough to fit all of the furniture in the seating area. In bedrooms, a rug should extend at least 18 inches beyond the edge of the bed.

Color

Choose a rug color that complements your decor and adds visual interest to the room. If your walls and furniture are neutral, a bold rug can add a pop of color. If your decor is already colorful, a neutral rug can help balance the space.

Pattern

Modern rugs come in a variety of patterns, from bold geometric shapes to subtle stripes. Choose a pattern that complements your decor without overwhelming the space.

Material

The material of your rug will affect its durability, texture, and price. Wool rugs are durable and soft, but can be expensive. Synthetic fibers like nylon and polyester are affordable and easy to clean, but may not be as plush as wool.

Maintenance

Consider how much maintenance your rug will require before making a purchase. Wool rugs require professional cleaning, while synthetic rugs can be spot cleaned with a damp cloth.

Pool decks serve as a beautiful and functional addition to any home with a pool. However, over time, the surface can become worn and damaged due to weather, foot traffic, or chemical erosion. To restore its original beauty and ensure long-lasting functionality, professional concrete pool deck resurfacing in Atlanta is the ideal solution. In this article, we’ll provide a step-by-step guide on how professionals resurface a pool deck, along with tips and insights to maintain its pristine condition.

Evaluating Pool Deck Condition

Before starting any pool deck resurfacing project, professionals assess the current condition of the surface. This involves looking for cracks, flaking, fading, and any other signs of wear and tear. The thorough inspection helps to determine the most suitable resurfacing option. For information on identifying the signs that your pool deck needs resurfacing, you can visit this blog.

Preparing the Surface

After analyzing the pool deck, professionals proceed with the necessary surface preparations:

  • Cleaning: Pool decks should be thoroughly cleaned before any resurfacing work begins. This may involve pressure washing, scrubbing, or other cleaning techniques to remove dirt, debris, and algae.
  • Repairing damaged areas: Cracks, chips, and other damaged areas must be properly repaired and filled before resurfacing. Using a high-quality repair product ensures a uniform appearance and reliable structural integrity.
  • Grinding or sanding: The existing surface might need grinding or sanding to create a smooth and level base for the new resurfacing material.

Choosing the Resurfacing Material

There are various materials available for pool deck resurfacing, such as stamped overlays, decorative concrete, and pool deck coatings. Professionals should consider factors like budget, desired aesthetics, and durability to find the right material for each specific project. One can even opt for custom pool construction mansfield tx if one wishes to have a beautiful pool according to their own taste and preferences.

Applying the Resurfacing Material

With every preparation step completed, professionals can now apply the chosen resurfacing material:

  • Priming: A primer is often applied to ensure a strong bond between the existing surface and the new overlay.
  • Mixing and Applying the Material: Following manufacturer guidelines, the resurfacing material is mixed and applied to the pool deck surface using specialized tools and techniques.
  • Adding Decorative Elements: If desired, professionals can add decorative elements – like textured patterns or colored stains – while the material is still malleable.
  • Sealing the Surface: Once the resurfacing material is dry and set, a high-quality sealer is applied to enhance the deck’s appearance and protect it from water, UV rays, and chemical damage.

Maintenance and Care

Proper maintenance is crucial to prolong the life of a resurfaced pool deck. Regular cleaning, timely repairs, and periodic resealing can help maintain the surface’s beautiful appearance and functional durability. Hire a professional service provider for concrete pool deck resurfacing in Atlanta to ensure that your surface looks its best.

To Sum Up

Pool deck resurfacing is a critical aspect of maintaining a beautiful and functional swimming pool area. Professionals should carefully evaluate, prepare, and apply suitable resurfacing materials to ensure long-lasting results and maximum customer satisfaction. By following the tips and advice in this guide, you can keep your pool deck in top condition for years to come.